Showing posts with label healthy eating. Show all posts

Friday, September 28, 2012

hey good lookin' whatcha got cookin'

Are you hungry?
If not, I am about to help you out!
I realized recently that I am not sharing my number one creative outlet on my blog.
Sewing. Well I love spending my time getting my seam on,
but it is not really kiddo friendly therefore it does not get to happen as much.

Zadie loves to cook.
Add that to our clean eating pledge 
and it means this lady cooks A LOT.

So I am trying to remember to document our kitchen explorations for your viewing pleasure.


First up is one of my favorite dishes, roasted cauliflower and aged white cheddar soup.
Um. Can you say YUM!
I also made these broccoli bites for the first time and they were delish.
I do change these recipes a bit to fit our diet, but I am sure they all taste just as lovely when fixed exactly like the recipe states.


Pretty stinking good.


A little lunch salad. So good.


Zadie's lunch. 
(Don't worry. She eats like 5 million meals a day. The girl does not go hungry :)


We (by we I mean me :) were having a totally sweet tooth craving one morning so we made these glazed donut muffins.
Am I the only person in the world who has my most severe sweet tooth cravings in the morning.
dessert- smert give me krispy kreme for breakfast any day!


I shared recently that the hubs and I got to go scalloping for a day, and these little beauties are a few of our delish treasures.
I love scallops.
I love pesto.
I REALLY love pasta.
This pesto vermicelli with scallops is to die for!
P.S. That is some homemade pesto yo. Fresh from the garden.

We recently dug up our sweet potatoes from the garden and I thought this sweet potato burger would be the perfect way to show case these beauties
and boy was it!
(This was our first year growing sweet potatoes and it was so fun. It is crazy how much better food taste straight from the garden!)


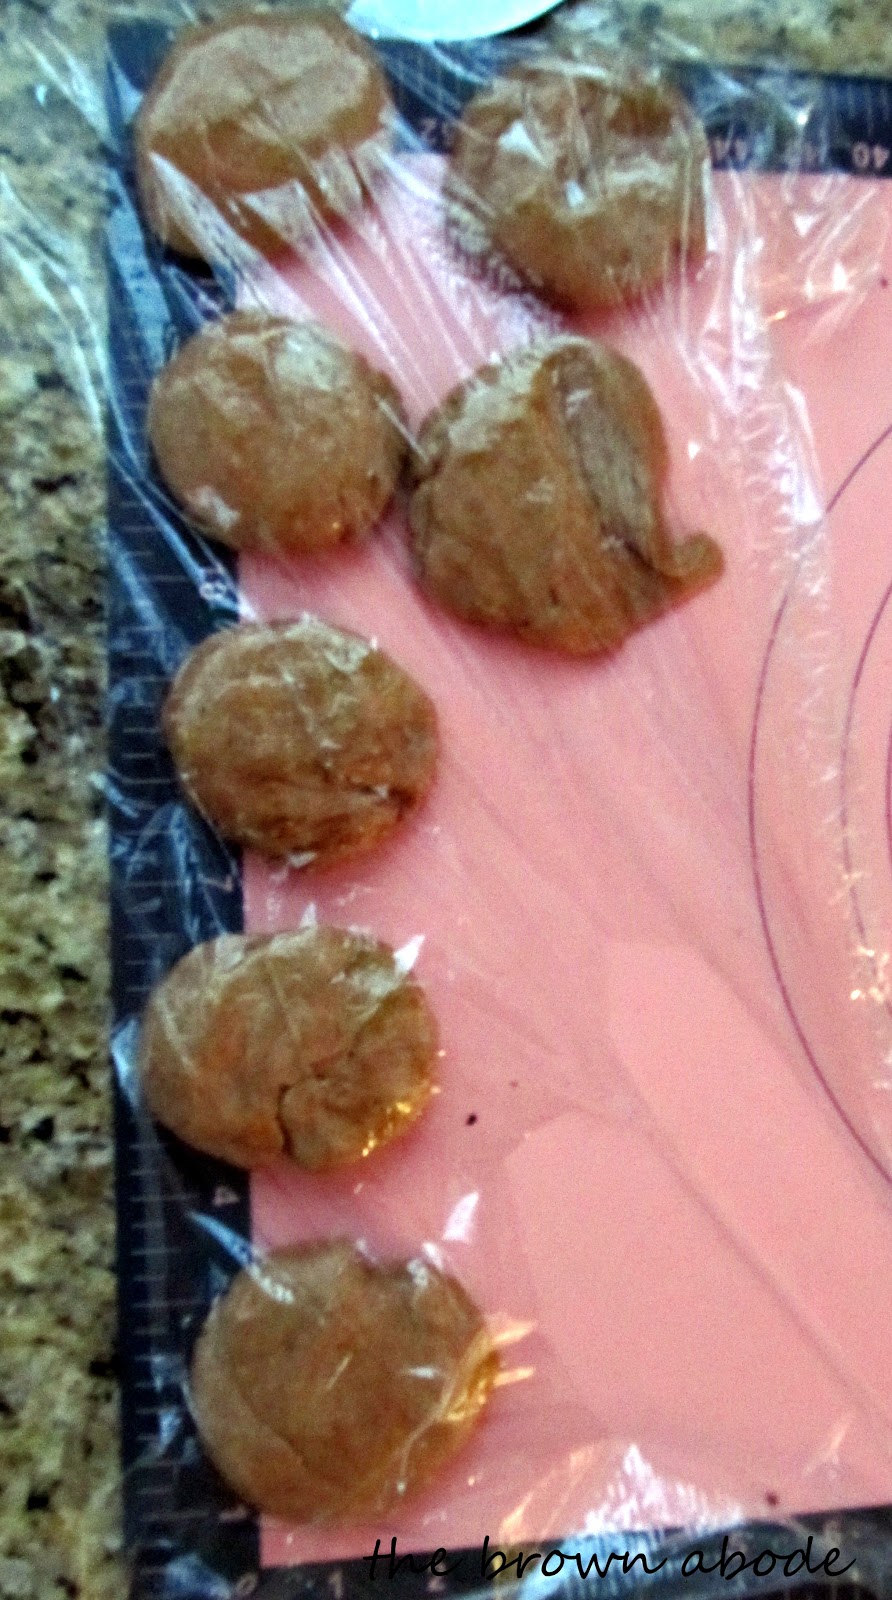
Last but definitely not least is a sneak peak of a little recipe I made up myself and will be sharing soon... aka- when I make another batch and take pictures BEFORE they are all gobbled up!

I swear I have SO MANY sewing projects to share with you.
I just really stink at taking pictures.
and since I have been sewing for myself a lot,
that means I have to actually bathe and fix my hair for the pictures...
It may be a while guys ;)

xoxo

Wednesday, August 8, 2012

I have bell peppers coming out of my... :)

(photo via)

This is absolutely how I feel right now!
My hubster picked 50- yeah you heard right- 50
bell peppers from the garden last week.
And that was not the first picking...
or the last.

Guys I just may turn into a bell pepper soon.

I am currently sitting on my couch with my feetsies up
for the first time all day!
I have been using up the bounty of my garden.
Yum!

50 bell peppers down...
and there are still more a-coming!

I wanted to share a quick run down of how I preserve my peppers in case any of you are looking for some ideas.

1. Freeze

I blanch the peppers (though I just read this is not necessary) then I chop them up all different ways- I leave some whole too- lay them out on cookie sheets then pop them in the freezer.
When they are nice and frozen I pop them off the sheet and put them into freezer bags.
This is my favorite way to save them because half the prep work is done when I need to use them in a
 recipe.

2. Roast

Seed and slice the peppers then stick them under the broiler in the oven until their skin is a little chard and bubbly (just a few minutes).
Let them cool and peel the skin off.
Then follow the same freezer instructions as above.
All you have to do is thaw these bad boys out and you have instant yummy-ness for all your sandwiches and pizzas!

3. Cook

Yesterday I made this tortilla soup and popped it in the freezer for a busy day.
Tonight for dinner I made mexican stuffed peppers (recipe below) and I had enough filling for dinner tonight, lunch tommorow, and a batch for the freezer!

4. Preserve

I am a newby in this department so I only tried one this year, green tomato relish.
The recipe is delish-
Now all we have to do is wait and see if I actually canned them right!

mexican stuffed peppers

6 large bell peppers
(I used peppers from my garden and it filled 10)
1 cup of cooked brown rice
1 lb ground beef (local if you can find it)
1 can of black bean rinsed and drained
1 can of diced tomatoes with green chilies
1/2 c frozen corn
1/2 tsp chili powder
1/4 tsp paprika
1/4 tsp garlic powder
1/8 tsp cumin
Salt and pepper to taste
1 c. mozzarella cheese

Preheat your oven to 375 degrees
Brown the beef in a large skillet. Drain. Add the rest of the ingredients and bring to a boil. Turn heat to low and simmer until most of the liquid is gone about 20 minutes. 
While that is cooking cut the tops off of the bell peppers and remove the seeds. Trim a little off the bottom of each bell pepper to help them stand upright.
Find a dish that the peppers fit nice and snug inside of and place them in it. Put a layer of rice in the bottom of each pepper and then fill the rest of the pepper with the filling. Layer the cheese on top of each pepper.
Cover with foil and and bake for 30 minutes. Uncover and bake 10 minutes longer.
(To freeze complete all the steps, but do not add the cheese. Put in a freezer safe container and store.)

So do you have any tips recipes to  share for my next batch?
I need all the help I can get!


Monday, June 11, 2012

whole wheat oatmeal carrot cookies


Have I told you lately how much I L.O.V.E. cooking and eating in the summer time?!
All the fresh ingredients make the farmer's markets explode!
And I seriously think that knowing you may have to squeeze into a bathing suit any moment curbs the ole' appetite a bit !
Lately our farmer's market has had an amazing selection of fruits and veggies in their discount section-
Which just so happens to be favorite section at the market :)
So, I have been stocking up!
The down side to the discount section is that you have to use that food pronto or it will spoil on you.
Luck us, that is a perfect excuse to use our juicer!!
A lot of times I feel a little guilty using the juicer because I waste all the pulp-
A smoothie is just so much cleaner and uses pretty much the whole fruit.
But if you add a little planning the juicer is not wasteful at all.
You really get two items for the price of one!

That is where these cookies came in-
I had several bags of carrots from the discount section that were dying to be juiced.
Before I juiced them I took a second to see if I could find a way to use the pulp.
I found this recipe and it is A.MAZ.ING.

Ingredients:
(adapted from cdkitchen)

1 cup honey
1 cup vegetable oil
1 teaspoon vanilla extract
eggs
2 cups whole-wheat flour
2 teaspoons baking powder
1 teaspoon salt, or to taste
1 1/2 teaspoon cinnamon
1 teaspoon nutmeg
1 teaspoon allspice
2 cups old-fashioned oatmeal
2 cups raisins
2 cups grated carrots

Preheat oven to 375 degrees

In a mixing bowl beat together the honey, oil, vanilla and eggs. 

In a large bowl, combine the flour, baking powder, salt, cinnamon, nutmeg, allspice and oatmeal and blend well. 

Then stir in raisins and carrots. Add the liquid ingredients to the mixture and blend well. 

Drop by teaspoonfuls onto an oiled cookie sheet. Bake for 12-15 minutes or until the cookies are golden brown. Remove the cookies from the cookie sheet and cool them on a rack before storing.

This recipe makes A LOT of cookies. So, I divided my dough into 3 sections. I baked one, and I rolled the other two into logs, wrapped them in freezer paper, and then I froze them. I have since eaten ALL the cookies (cooked and frozen) and they were delish! I just let the frozen dough thaw for a few minutes before I sliced them up and popped them in the oven!

Enjoy!

P.S. Some good stuff to juice with carrots- an apple, a handful of grapes, or a juicy tomato. Yum!


I love to party at these great places!


Wednesday, May 30, 2012

homemade vanilla extract

When we decided to make the switch full-time to eating unprocessed food
I knew I as going to have to do something about vanilla extract.
Between making bread and granola almost every week,
and pretty much every recipe having it as an ingredient, (maybe a slight exaggeration ;))
We happen to use a TON now.

For a couple of years my mil has been encouraging me to make some homemade vanilla extract as gifts.
Well, I never got around to it...
 Until, well, I needed it (blush)!
It was super simple to make.
And would make a FABULOUS gift, if you are not a procrastinator like me!

You wanna know how to make it?
Here ya go


I read A LOT of tutes about making this and most people recommended using vodka.
But a few also said you could use rum or brandy instead for a different taste.
I may have to try spiced rum next time....YUM! 


Step one: Starting one inch from the top, cut your vanilla bean in half with a paring knife.

*You will need 3 to 4 beans per every cup of liquor used.


Step two: Measure out you liquor and pour it into your bottle.

* I used 4 beans because my bottle held 1 1/4 cups of liquor.
* Be sure to use a bottle that seals nice and tight


Step three: Seal your bottle and give it a good shake!


* You should see some of the seeds already floating around

Store your container in a cool dark place.
Give it a good shake every week.
It should be ready to use in two months.


(Can you tell I have already used it a few times! Sorry about the fingerprints.)

*Extra tips*
1. I bought my vanilla beans off of Amazon. 
2. Only buy as many as you need for you container unless you plan to make some gifts because the leftover beans do not store long!
3. When your bottle gets about half full fill it again with liquor and you are ready to go. You can keep refilling it like this, with the same beans, about three years!!!! 
Sa-weet!
4. I ordered my bottle because I wanted one that would last, but I don't think it was necessary. You can get bottle like this or with a cork top at most any store.

I have a pretty great gift idea coming up for you if  you decide to make extra of these little wonders!

Happy Baking!


I am linking to these great parties


Thursday, May 24, 2012

Tomato tips and a yum yum yummy recipe!

Can you guess where I just was?

Holding my sweet new NIECE!!!
Yes, she is finally here and she is so precious.
In my husband's side of the family that makes the score
granddaughters: 5
grandsons: 0
We love us some girlies!!

Now.
The hubster and I do not consider ourselves master gardeners.
This is actually only the third year we have grown one.
We are just trying to figure it out still ya know.

We joke sometimes that we would probably save money just buying the in season veggies from the  grocery store.
Hopefully, in the years to come that wont be true ;)

That being said our tomato harvest has been A.MAZ.ING. this year!
Whoop!!
I wanted to share a few novice tips that have really helped us out.
You may know these, but if not- YAY! 
Maybe this will help your garden.

  1. Plant Marigold flowers around your tomato plants to ward off bugs and bring in bees.
  2. Save old egg shells and lay them around your plants. It gives the plants much needed calcium and makes the soil happier too!
  3. If you live in a hot area (like Florida) you need to get an early producing variety of tomatoes such as early girls. They just don't like the heat...(I totally understand!)
Hope those help!
If you have any other tips for me... feel free to share.
Especially some tips for Zucchini and Squash.
We are about to give up on them completely :(

Anywoo, if you have had fabulous luck like us and have tomatoes coming out of your ears....
You will LOVE me for sharing this recipe!

(I didn't make mine vegan)


P.S. sorry for the poor picture quality :(

Much Love

Friday, May 18, 2012

an amazing lunch brunch!

Today a miracle happened.
My girls napped at the SAME TIME! 
Amazing.
So in honor of my "free time" I made a special lunch.
I decided to make up for the breakfast I missed (dentist....ugh!)
even though it was lunch time.

This is what I indulged in.


Coconut coffee and a banana pancake with cream cheese and strawberries.

YUM. YUM. YUM.

Wanna make some for yourself?
Here you go.

coconut coffee:
1/4 a can of coconut milk
cold coffee
2 ice cubes (i use frozen coffee cubes)

The recipe for whole wheat banana pancakes is here. These are the most amazing pancakes I have ever had. When they are fresh off the griddle the banana taste like hot melted butter. I made them for breakfast earlier this week and I froze the leftovers. Today I grabbed one out of the freezer, slathered some farmer's cheese on it (friendship brand cream cheese),  and threw some frozen strawberries on top. I put the whole thing in the microwave  for about two minutes.

It was so amazing I just had to share!


Happy lunch brunching!


Wednesday, April 18, 2012

Tortillas

I told you the other day that I made my own tortillas.
I am so proud of myself and I was pleasantly surprised by how easy it was!

Funny story- The hubby and I were talking the other day about how "clean" we wanted to go with our clean diet. I said- verbatim- "Well, you know I want to be pretty strict, but it will be a gradual process. I am not going to start, like, making my own tortillas or anything for a while. I am not awesome enough to take care of two babies and be that intense with our food."

Obviously I don't know how awesome I am. ;)
OR....
I am not thorough enough on my grocery list. :)

I used the recipe from the 100 days of real food website.

Here are some pics for your enjoyment

I divided my dough into six equal balls.

I rolled it nice and thin and then through it in the frying pan.

Doesn't it look deluxe?!

Now I need to work on my shaping skills ;)

Have you tried any recipes lately that you are proud of? Any that I need to try?
Do tell!!

Much love


Sunday, April 15, 2012

clean eating menu 4

I was thinking today that I haven't shared with you guys some great news...
We've decided to keep up whole food, clean eating, unprocessed diet
(Whatever you want to call it!)

In this post I explained my goals and reasons why.
Here are the results from goals.
1. I did lose (most of) the baby weight,but that could be because I am breastfeeding and chasing a toddler!       :)
2. I didn't get to exercise as much as I wanted to. I started doing yoga again but no running yet.. sad day. So I can't really give you a result for this one.
3. I BLEW the budget by $300! Eating healthy is seriously expensive! On the positive side I did have to pretty much recreate the fundamental cooking ingredients in my kitchen all at one time, so I don't think it will be as expensive every month. 
We shall see.
So far this month I have stayed in the boundary- keep you fingers crossed for me :)
4. I am SO much more aware of food labels now. I mainly shop the perimeter of the store. And if I can't say all the ingredients on the label or don't know what they are, I don't buy it.

Anywho
Brent and I both agree that we feel so much better physically (ironically the whole family is SICK as i write this!) and about how Zadie eats.
So on this road we will continue. It has definitely  not been a simple  change but the more I learn the more   passionate about it I become.

So without further ado
here is our menu for the next bit.

Breakfast:

and fruit


whole wheat crepes


granola

Lunch:


Steak, veggie kabobs marinated in teriyaki sauce
and roasted homegrown red potatoes

This was a good dinner. I not a huge meat fan so steak night is never my fave.
I do LOVE roasted rosemary and lemon new potatoes though.

Pinned Image
Quesadillas with the leftover veggies from the kabobs
Guacamole and chips

These were so very good.
I even made my own tortillas.
(Pictures/ recipe coming soon!)

garden vegetable casserole

Two positives:
1. It tasted WAY better than I expected.
(I am not generally a casserole fan)
2. I used up the leftover veggies that did not fit on the kabobs
(yay! for no waste!)

Pinned Image
Greek fajita with tzatziki-sauce

 
Quiche
(because we are addicted!)


whole wheat pizza packet

Sweets:


dark chocolate whole-wheat brownies

Apple slices with peanut butter dip
apples with peanut butter dip

This was a tonight sweet tooth recipe addition! It definitely fulfilled my desert craving. I already decided that this is my new baby shower go to finger food. It is seriously delish!

Wanna came for dinner? I would LOVE to feed you and have a nice chat.
As always if you wanna join me or have some good recipes to share, let  me know!

xoxoxo


Linking to these great parties!
Related Posts Plugin for WordPress, Blogger...