Helllllo Friends!
Happy November!
I just LOVE this month.
I do wish it could be just a little colder though.
I have been working on several projects the past couple of weeks.
- My craft closet
- Zadie's big girl room
- a cute new tunic
- revamping a homemade shelf
I am not going to talk about those all today. But they will be coming sooooon!
If you noticed my lack of consistent posting the past couple of weeks I am sorry! Between my sewing machine frustrating the crud out of me and fighting the extremes of nesting then NO motivation, I have been foul. Seriously foul.
Sorry friends!
(Sorry hubby :)
Let's start with the shelf:
A few weeks ago I had a mantle reveal. I LOVED the way it turned out.
Except...
My poor mantle shelf was just not well crafted the first time.
So hubs, being the great sport he is, helped me revamp it yesterday.
Here is the before pic

and the after...

Here's a close-up just of the shelf..

It is SOOO pretty!
We were only going to add the supports
BUT
Brent had this wood wax he was DYING to try.
SO
we stained it and then waxed it.
WHA-LA
The new and improved mantel/shelf!
Now for the DIY tunic.
I love tunics. Actually I love anything that doesn't really touch you but still looks spectacular- pretty much anything flowy and light.
I have admitted before that I am a novice in the sewing department. I have been doing it a long time but WITH my grandmother. That means, anytime I had to do anything other than a straight stitch I would pretty much let her handle it and I would watch.
So, in the spirit of independence I decided to start small- NOT- and create my own pattern (Seriously!?!)
It really wasn't that hard, but I did learn some pretty important lessons I want to share with you.
First I found a shirt I really like to use as a starting point.

I laid it on some pattern making paper my grandma handed down and started tracing.


Can you see the tracing?
If you can't, I promise it is there.
Then I took my measurements and started to modify the original pattern.

I wanted the sleeves to drape more and I wanted it to be longer so I could wear it with just leggings or on its own when I am not preggers.
I also needed it to really be a sheath since I am preggo and do not enjoy my pregnant booty.
SO I took a ruler, pencil, and a cutting board and I went to town.
Here is where my lessons were learned. I am just going to list them:
- When tracing a patterns using another piece of clothing do not trace RIGHT on the clothing line, allow for a seam. -- duh! (This really only affected my neckline thank goodness!)
- As grandma says, "Always mark the center!" Well I need to start listening to this advise. It would have worked MUCH better had I modified one side of the pattern then simply folded it down the center and traced the modified side. I spent half my time measuring and remeasuring trying to get all the angles the same, and I didn't...
- Which leads me to this lesson. Cut the fabric with the right sides together. If you do not you will have to match two sides that may not have been cut exactly the same. (duh, duh, duh!)
- Finally, when working with silky material, serge the ends of the fabric before sewing because they fray A LOT!
Well, even with all these lessons I still think it turned out great. Here you go!


Sorry about the pics. I took them FIRST thing this morning.
Like pre-tooth brushing.
Yuck!
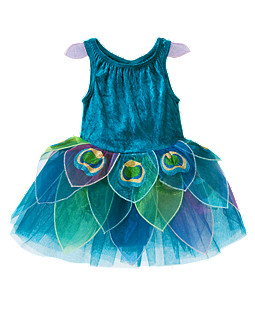
I made this originally as my Halloween costume to match Z-bugs.

But i will be wearing it much more because it is so stinking comfortable and versatile.
Put it with jeans and flats
Or leggings and heals
or just heals
And wha-la
You are ready to go!
I hope you learned some from my mistakes!
~happy seam ripping!