Showing posts with label baking. Show all posts

Thursday, November 10, 2011

Cookies!

Today was cold and rainy in the great state of Florida.
In my opinion that is the PERFECT day for one of two things.
1. A Harry Potter marathon
2. Baking, baking and then eating!

We chose option number 2 today and I thought I would share our finished project with you. I wish I could let you have a taste test.
These cookies are GOOD!

I set the hubs on a mission this morning. I opened my Pinterest baking board and I told him to choose.
He chose well.

First we have chocolate chip cheesecake cookies
AKA heaven on earth!


Here is the recipe:


Chocolate Chip Cheesecake Cookies

  • 2 cups all-purpose flour
  • 1/2 teaspoon salt
  • 1/2 teaspoon baking powder
  • 1/8 teaspoon baking soda
  • 10 tablespoons butter (1 stick plus 2 tablespoons)
  • 1 cup sugar
  • 1 egg
  • 3 ounces cream cheese
  • 1 teaspoon vanilla
  • 12 ounces chocolate chips
Preheat oven to 375.
Combine dry ingredients (flour through soda) in a bowl and set aside. In mixer, blend butter, sugar, egg, cream cheese, and vanilla. Slowly add the dry ingredients, mixing with each addition, until all are incorporated. Stir in the chocolate chips.
Grease a cookie sheet. Drop dough by the spoonful onto sheet, at least 1 inch apart.
Bake 10 to 12 minutes or until golden brown around edges.

I give it 4 out of 5 stars.
The only reason it is  not 5 stars is because this second recipe may be my new favorite cookies recipe so nothing could really compare.

Ginger cookies anyone?!


The Barefoot Contessa worked her magic again.
I am becoming a HUGE fan of hers.

Here is the recipe:

The Barefoot Contessa’s Ultimate Ginger Cookies
Makes 16 cookies

2 1/4 cups (270 g) all-purpose flour
1 teaspoon baking soda
2 teaspoons ground cinnamon
1 1/2 teaspoons ground cloves
1/2 teaspoon ground nutmeg
1/2 teaspoon ground ginger
1/4 teaspoon kosher salt
1 cup (170 g) dark brown sugar, lightly packed
1/4 cup (60 ml) vegetable oil
1/3 cup (80 ml) unsulfured molasses or black treacle
1 extra-large egg, at room temperature
1 1/4 cups (170 g) chopped crystallized ginger
granulated sugar, for rolling the cookies

Preheat the oven to 350°F (180°C). Line 2 sheet pans with parchment paper.
In a large bowl, sift together the flour, baking soda, cinnamon, cloves, nutmeg, ginger, and salt and then combine the mixture with your hands. In the bowl of an electric mixer fitted with the paddle attachment, beat the brown sugar, oil, and molasses on medium speed for 5 minutes. Turn the mixer to low speed, add the egg, and beat for 1 minute. Scrape the bowl with a rubber spatula and beat for 1 more minute. With the mixer still on low, slowly add the dry ingredients to the bowl and mix on medium speed for 2 minutes. Add the crystallized ginger and mix until combined.

Scoop the dough with 2 spoons or a small ice cream scoop (I used a 1/4 cup measuring cup, which is 90 g of dough). With your hands, roll each cookie into a 1 3/4-inch ball and then flatten them lightly with your fingers. Press both sides of each cookie in granulated sugar and place them on the sheet pans. Bake for exactly 13 minutes. The cookies will be crackled on the top and soft inside. Let the cookies cool on the sheets for 1 to 2 minutes, then transfer to wire racks to cool completely.

I modified this a bit.
1. I used the ingredients I had on hand such as regular store brand molasses, light brown sugar, and fresh ginger.
2. I made my cookies A LOT smaller. These call for monster cookies. My batch made about 2 1/2 dozen.
3. I asked my husband to read the directions for me and tell me what to add with the molasses. He go everything backwards.
I have no idea how.
But they still turned out great!

We also picked and cooked some fresh greens for dinner.

And....

I put together all the ingredients for homemade goldfish but that dough is still in the fridge because I just ran out of steam!

SOOOO if you get the time come stop by for a cookie!
I have PLENTY!

~Happy Baking!

Tuesday, November 1, 2011

Persimmon Bread...MMM...MMM... GOOD!

One of my husband's patients brought him MORE persimmons. Now, I am not complaining I am simply informing you that we didn't use all of them for the last batch of cookies so we still had some of our own. We had A LOT of persimmons so we decided to make bread. Here is the best recipe we could find (meaning it used the most persimmons :)

Persimmon Bread


Using the higher amount of sugar will produce a moister and, of course, sweeter bread.
From Beard on Bread by James Beard.

Ingredients:
3½ cups sifted flour ( I used half all purpose flour and half white whole wheat flour)
1½ teaspoons salt
2 teaspoon baking soda
1 teaspoon ground nutmeg
2 to 2½ cups sugar
1 cup melted unsalted butter and cooled to room temperature
4 large eggs, at room temperature, lightly beaten
2/3 cup cognac, bourbon or whiskey
2 cups persimmon puree (from about 4 squishy-soft Hachiya persimmons)
2 cups walnuts or pecans, toasted and chopped
2 cups raisins, or diced dried fruits (such as apricots, cranberries, or dates)

Directions:
1. Butter 2 loaf pans. Line the bottoms with a piece of parchment paper or dust with flour and tap out any excess.
2. Preheat oven to 350 degrees.
3. Sift the first 5 dry ingredients in a large mixing bowl.
4. Make a well in the center then stir in the butter, eggs, liquor, persimmon puree then the nuts and raisins.
5. Bake 1 hour or until toothpick inserted into the center comes out clean.

Storage: Will keep for about a week, if well-wrapped, at room temperature. The Persimmon Breads take well to being frozen, too.

We did not use nuts because we did not have any and we used crown as our liquor.
Here are some pics:
 Orange for Halloween.. Right?!
 I was grumpy.. can you tell ;0
 mmm... raisins

 Really, I love the color!
 The dogs waiting patiently for the bread to finish (Like they are going to get any!)

 Sorry about the fork mark in the middle of the loaf. Rookie mistake
 And now for the taste tester shots...


Score! She gave it 5 stars!

It was SO yummy!

We even got to boo our neighbors with the other loaf.

And.... Brent just asked if we could go pick MORE today!
I am going to turn into a persimmon!!

~Happy baking

Wednesday, October 19, 2011

Persimmon cookies... Who knew?!


Anyone else finally feeling the cool weather?! I was SO very excited when I woke up this morning. I know it will leave again since it doesn't truly get cold here until Thanksgiving, but for now I am going to enjoy!

I don't know about you but cool weather always makes me want to BAKE! Today's recipe was picked, found, and made by hubby dearest.

I say picked because he had to go to the neighbors persimmon tree and get the fruit. Our neighbor doesn't even like them!

I'll have to admit... I had my first persimmon last week and it was, well, WEIRD! In my mind orange fruit should be tangy, but persimmons taste like fall. Seriously.
These cookies have won me over! My house smells SOOO good right now!

Persimmon Cookies
Ingredients:

1 tsp. Baking soda
1 c Sieved persimmon pulp
1/2 c Butter or margarine
1 c Sugar
1 Egg
2 c Flour
1 tsp. Baking powder
1/2 tsp. Salt
1/2 tsp. Ground cinnamon
1/2 tsp. Ground cloves
1/2 tsp. Ground nutmeg
1 c Raisins and/or nuts


Directions:
Stir soda into persimmon pulp and set aside.

Cream butter and sugar together.

Beat in egg, then persimmon mixture.

Sift flour with baking powder, salt, cinnamon, cloves and nutmeg.
Add to creamed mixture along with raisins or nuts. Mix thoroughly.

Drop by teaspoons onto greased baking sheets and bake at 350F 8 to 10 minutes.
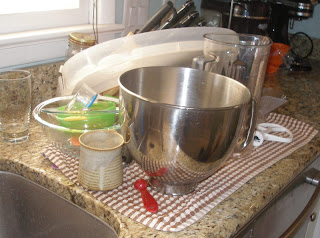
He even did the dishes while they baked!

They smelled so good they woke Zadie up from her nap with a smile! :)
If you have any persimmons (or awesome neighbors:) you need to go make these cookies. Seriously... GO now!

~Happy Fall Baking


Monday, October 10, 2011

Grandma's birthday

Tonight we celebrated my grandmother's 83rd birthday. She is such an amazing woman.
This is a picture of 3 generations of my family. Zadie baby was only one week old when this was taken-time flies. My beautiful grandmother is holding her.

I volunteered to make the cake for grandma's birthday bash and I of course chose to make my Granny Thomas's (grandma's mom) famous cake- 'Granny Cake'. I am going to share this old family recipe with you and I will probably hear about it from my grandma in the morning. Not that she will be mad that I shared it, I just gave her all kinds of trouble when she added 'our secret family recipe'  to the church cookbook one year so I have it coming to me! ;) Anywho, before I begin I just want you to know that this cake has no calories, or fat, or any other horrible thing you can think of that may clog your arteries or add inches to your thighs. This recipe if free of everything that may make you feel guilty because it is a family recipe. It holds dear memories of days spent at my great grandmother's house, and nights sharing the leftovers with the girls in my dorm at college. I remember helping my grandma make this as a little girl. SEE, all that good out ways any bad in this recipe and I am passing those memories to you so that you can enjoy this protein filled cake guilt free!

Granny Cake

Ingredients:
3 cups sugar
1 1/2 cup butter flavored Crisco
9 eggs (We all need some protein right!?)
3 cups flour
3 cap fulls of imitation vanilla butter and nut flavor

Directions:
Cream the sugar and Crisco together. Add the eggs one at time, mixing well after each. Stir in the flour and the flavor. Pour into a greased bunt pan and bake at 350 degrees for 1 hour and 5 minutes.

Did you feel your arteries clogging just by reading this recipe? :) We eat pretty healthy at my house but when it comes to desert I just can not get into the healthy substitutions. My rule is to only eat one serving and to go running the next morning. ;) I am telling you, this cake is WELL worth the calories. I promise.
I got this from my grandma. I am not sure what I am going to do when it runs out! I need to start looking for it.

MMMMMM.......

This is what I brought home. I call that a success!

This is also the grandmother who taught me to sew and took time to make crafts with me when I was a little girl. So in honor of all those great memories, I decided to make her birthday card. I got the idea from Pintrest of course!
Fabric Emb Birthday Card
Isn't it cute! it is from the blog October Afternoon. I was having sewing machine problems again so mine did not turn out quite as cute as I was imagining but I still really liked it! I'll show you what I did.
I picked a 'calm' piece of scrapbook paper and cut it to a standard card size.

I sewed a scrap piece of brown fabric to the front of the card. It was meant to be imperfect. I am not THAT bad at sewing straight!

I picked two different pieces of fabric (only one is pictured) folded them in half and stitched loops and circles all over them.
I cut a stem and leaves out of one piece of fabric and I cut the flower out of the other fabric. I sewed a button in the middle of the flower and then I hot glued the entire thing to the card. Then I found a sweet flower quote online, wrote it on strips of paper, and then I hand stitched them to the card.

Finally I added our personalized note inside and the card was complete! I thought it turned out pretty cute, but I was definitely not being a perfectionist. Sometimes life is just more fun when you love the imperfections. 

Before I sign out tonight I have a little teaser for you...
While I was working inside Brent was working on a project for me outside. It has something to do with that sad empty wall. You will have to come back tomorrow to see the transformation!
P.S. Isn't Luna just the cutest thing! I love that puppy.
~Happy wondering

Related Posts Plugin for WordPress, Blogger...